
**This is 1 of 2 posts that I have today, if you are looking for the Scrapy Land Challenge # 63 please go here.**

Welcome to the Joy Clair and My Sweet Petunia's Misti Blog Hop!! We are so glad that you are joining us for this fun collaboration blog hop! We have two different and talented Design Teams, full of creative ladies that will surely spark your creativity along the way. PLUS amazing prizes to share with you!! Just be sure to leave comments during the hop so you can be entered to win a MISTI (orginal or mini, your choice) and one of two $25 Joy Clair Stamps Gift Card!!

You should have come here form Lydia Fiedler's blog.
If you should get lost along the way you can go to the Joy Clair Blog or the My Sweet Petunia Blog to start over.
Here is the line up for the Joy Clair & My Sweet Petunia Blog Hop:
Lori Kobular ~ YOU ARE HERE
Prizes:
Joy Clair is giving 2 ~ $25 Gift Certificates to the Joy Clair store.
My Sweet Petunia is giving 1 ~ MISTI (Winner's choice of Original or Mini)
For a chance to win one of these awesome prizes all readers need to leave a comment on all the blogs, including the Joy Clair Blog and My Sweet Petunia Blog. The deadline to comment is Sunday, April 9th at midnight.
The Joy Clair winners will be announced on the Joy Clair Blog at the end of the month and the winner of the My Sweet Petunia Misti will be announced here on April 14th.
Now about my card that I made with my new mini Misti!! I absolutely LOVE my Misti! It gives me Precision Stamping every time I use it! I have been having such a good time playing with my Misti!!

For my project I made a card using the Joy Clair God's Focus stamp set.

One of the great things about the Misti is you can place your stamp directly where you want it positioned on your paper.

Then you close the lid and the stamp sticks to it. Then you ink up the stamp with the color ink that you want to use and your close the lid .

And you press down on the stamp so that the ink goes where you want it

And if the ink isn't as dark as you like on your project, then you just re-ink the stamp and press the lid down again and it will stamp exactly in the same spot! This is the most exciting feature for me because I can't tell you how many times I didn't have the ink on my stamp evenly and then no matter how hard I tried to line it up again, it just doesn't work. So with the Misti there is no wasted papers!

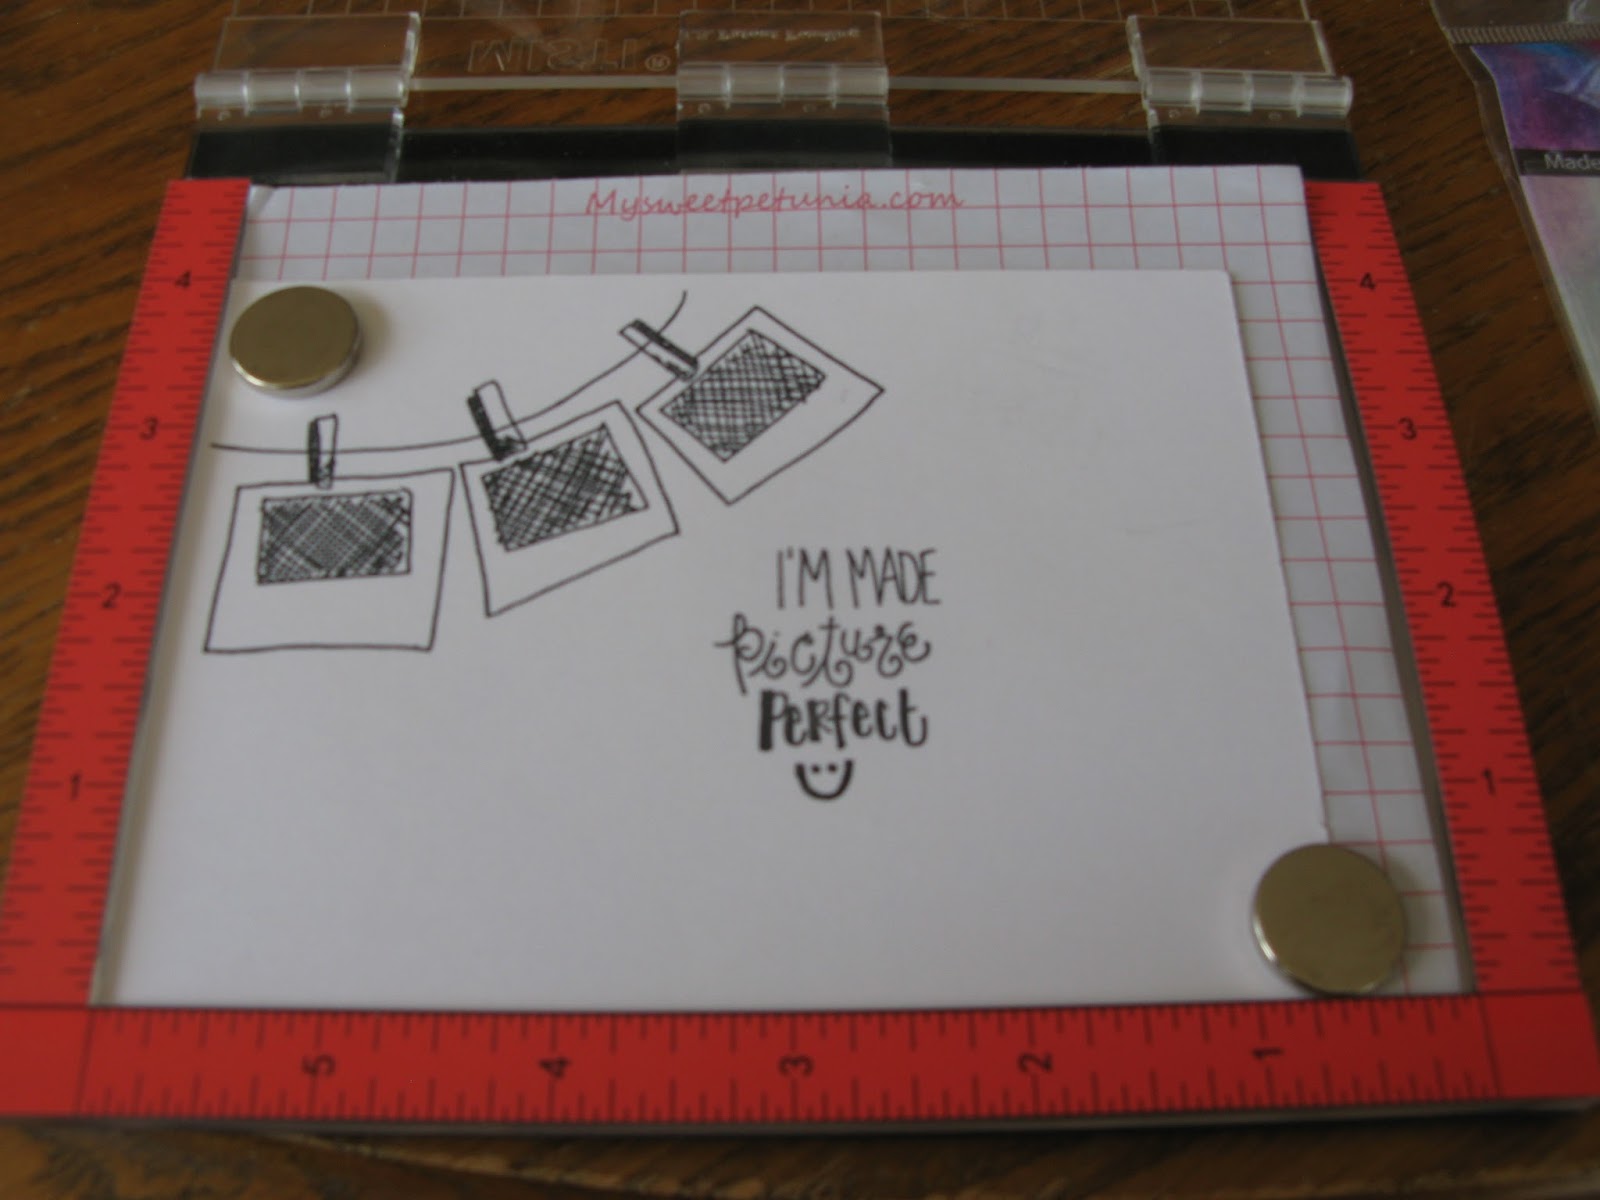
Now I placed the other stamps that I want to use from the Joy Clair God's Focus stamp set. This is such a fun stamp set and I know I will be using it again and again! I think you would love it too!

Now I leave the sentiment on the paper and take the other stamps off, bring the lid down and pick up the stamp

I ink up my stamp and close the lid to get precision stamping

I lift the lid and see that the stamp stamped perfectly! I love it!
Now I position the camera where I want it on the card

Close the lid and pick up the stamp and then ink the stamp

Pick up the clear plate and ink the stamp

Close the plate back down and give the stamp a little press and it is stamped perfectly!

Then I position the negative stamp where I want it on the paper and ink it up

Press down onto the paper

And VOILA it is perfection!! Now it is time to color!

I colored with Copic markers R29, W1, W3, W5, B00 and B02

When I was finished coloring my camera, picture and negatives I mounted the paper onto some dark gray paper and then mounted that onto a A2 white card base.
Your next stop on this blog hop is Kia Gibson-Clapper's Blog
Now don't forget to visit all the stops on the Blog Hop and make sure to leave a comment on each blog for a chance to win some really awesome prizes!!
I hope I have inspired you to try some of the wonderful Joy Clair stamps and the Misti!!
Thanks for stopping by!
Lori
Great job Lori, thank you for sharing, love that stamp set.
ReplyDeleteLove it Lori.
ReplyDeleteCute stamp set and a great tutorial! Love your card Lori.
ReplyDeleteLynn
hi Lori this is a stunning card. Thank you for sharing the instructions. I have just ordered the Tim Holtz stamping tool. It does look like the Misit. Take care. Hugs Jackie
ReplyDeleteThis is so cute ...
ReplyDeleteThis is so fabulous, Lori!! I love the stamps you used and the layout!! It's so beautiful!! Your tutorial is awesome, too!! I don't know what I ever did before my Misti!! Have a great day!! Big hugs :)
ReplyDeleteLisa
A Mermaid's Crafts
SUPER JOB!! You know, I've been thinking.... I don't think I've ever heard of Joy Claire Stamps!!! THIS HOP is a good introduction for me! ;) LOOOOVE this set too! PERFECT AGAIN for Bible Journaling! ;)
ReplyDeleteFabulous card, Lori!
ReplyDeleteGreat card. This set is so fun! I loved working with it too.
ReplyDeleteThe MISTI sure does make it easy to create a background. Nicely done!
ReplyDeleteLOL, what a cute card Lori and the sentiment is perfect too!
ReplyDeleteGreat card! Love the way the MISTI allows such great positioning of the stamps, and the opportunity to re-stamp when necessary!
ReplyDeleteLove the scene and that sentiment is awesome!
ReplyDeleteCute card! The Misti makes everything so much easier.
ReplyDeleteSo very cute!
ReplyDeleteFun and cute card!!
ReplyDeleteVery cute!
ReplyDeleteGreat card Lori
ReplyDeleteEnjoyed your sharing of your card
ReplyDeleteLove this fun card and thanks for the step by step tutorial:)
ReplyDeleteNice card.
ReplyDeleteHow cute - would be great for a couple of my picture taking friends!
ReplyDeleteThanks for the amazing tutorial! Love your card!
ReplyDeleteCute card. Very nice tutorial.
ReplyDeleteGreat tutorial and card!! Love it!
ReplyDeleteSuch a cute fun card. Thanks for sharing and participating in this blog hop.
ReplyDeleteThanks for sharing!
ReplyDeleteI love getting new project and supply ideas! Thanks!
ReplyDeleteI adore your card and the stamp set!!! these are really different and cool!!!
ReplyDeleteThat's right! So positive and uplifting!
ReplyDeleteCute card! The Misti has become such a staple on my desk, I wonder how I survived without it.
ReplyDeleteO I love your card. It is so cute and pop of red sets it off. TFS
ReplyDeleteFun stamp set and a great card! Thanks for sharing with us.
ReplyDeleteFun card. Thanks for sharing it.
ReplyDeleteSuch a cute card. I'm going to have to get a larger MISTI.
ReplyDeleteA wonderful card. Thanks for such an informative tutorial!
ReplyDeleteGreat to get all of the stamping done
ReplyDeleteat one time. Being able to
arrange (and re-arrange if needed)
if wonderful.
thanks for sharing a cute card.
Wonderful card. I have the large Misti and love using it for almost every card I do now.
ReplyDeleteWhat a fun stamp set, your arrangement on the as cute.
ReplyDeleteFun card. Love how you only gave the camera color. Thanks for the inspiration
ReplyDeleteOh boy... I can see this set for so many different cards.
ReplyDeleteCUTE CUTE!!
XO April
I would love to have a misty. Cute card
ReplyDeleteLove your placement of the stamps for your card. Super cute. Thanks for sharing your steps with the Misti.
ReplyDeleteGreat card design. I like how the camera pops.
ReplyDeleteThanks for taking us through the steps. Finished product is super!
ReplyDeleteJoy Clair is new to me. Such clever stamps!
ReplyDeleteYour card is wonderful and love the sentiment. Thanks for the stamping information.
ReplyDeleteGreat card, thanks for the tutorial!
ReplyDeleteSuch a lovely card!!!
ReplyDeleteGreat card! Love how you used the Misti! TFS
ReplyDeletePicture perfect card!
ReplyDeleteThanks for the great tutorial! Love the cute card!
ReplyDeleteThanks for the step by step! Nice card!!
ReplyDeleteNice card! These stamps are so different, it's refreshing. Love the style of design used... :o)
ReplyDeleteThe MISTI is a great tool! If you wanted, you could have placed each of your stamps where you wanted, inked them all, and stamped the whole thing at once to save time!
ReplyDeleteThanks for sharing and for a chance to win!
ReplyDeleteLori, nice card and love how you used the Misti.
ReplyDeleteWhat a sweet little card!
ReplyDeleteThis is so cute! Love the stamp set you used and so happy you got a Misti.
ReplyDeleteMISTI will be a life/game changer! Awesomeness through and through!
ReplyDeleteBlessings,
Melitta
What a fun retro card!
ReplyDelete